
Guide
Your first day in KAISPACE
Ten steps, in order, from signing in to working as usual. One step needs Lark and says so plainly — the rest work with no integration at all.
About 15 minutes
Step 1
Join your first SPACE
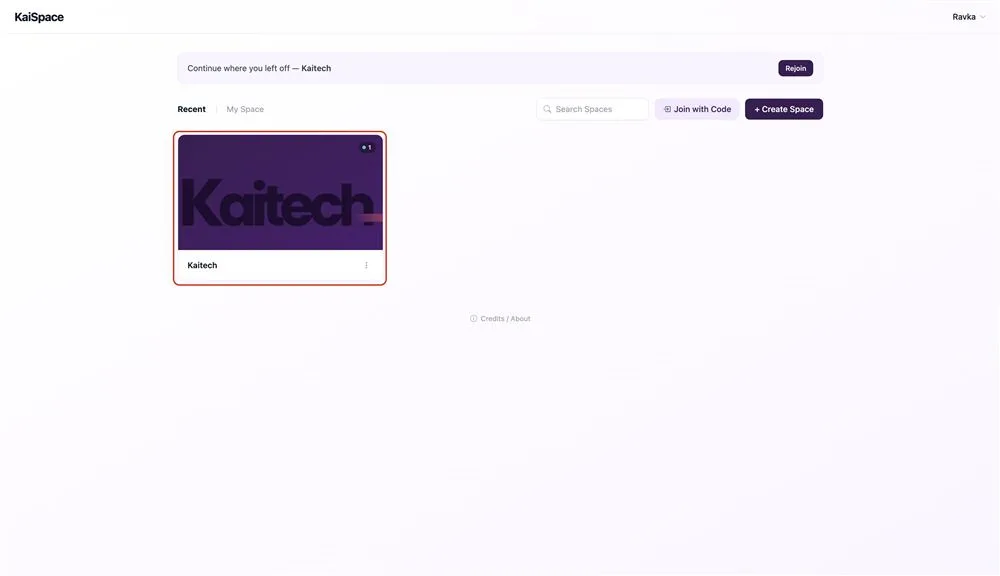
Open the invite link from your admin and sign in with Google or Lark. You land in the Lobby, the list of every SPACE you may enter.
Click a SPACE card to go in. If all you have is a six-digit code, click "Join with Code" and type it.
If the room requires approval, you join a queue and your admin is notified — usually a matter of minutes.
Tip
A browser is all you need — there is nothing to install. Recent Chrome, Edge and Safari all work.
Step 2
Walk around the office
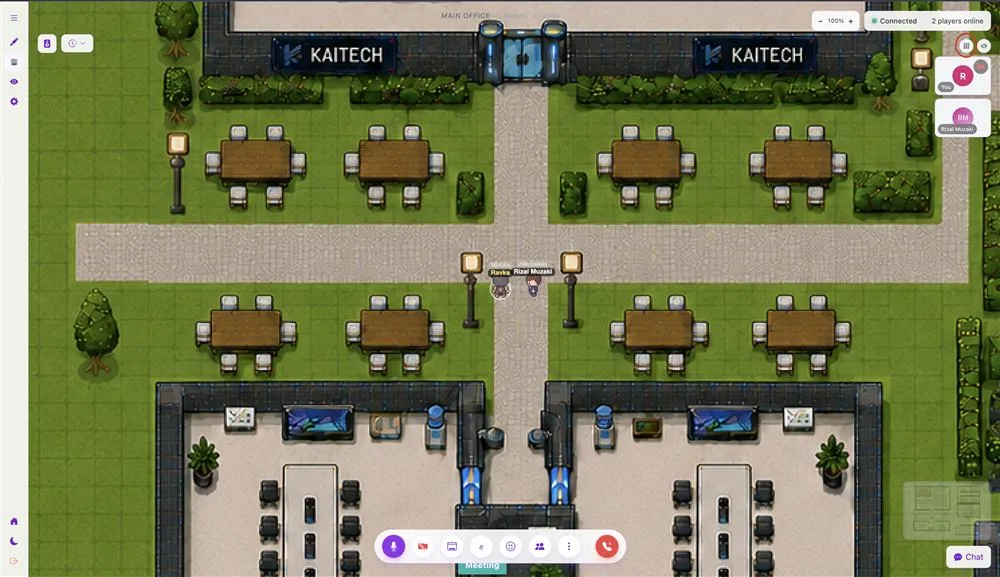
Move with the arrow keys or W A S D. You can also click a spot on the map and your character walks there on its own, finding a way around desks and walls.
Hold Shift or R while moving to run.
The small map in the bottom-right corner shows the whole floor plan. Click anywhere on it to jump straight there.
Shortcuts
- W A S Dwalk
- Shift / Rrun
- Spacesit in the nearest chair, or jump
- Xopen an image, video or file near you
- Fuse the door, portal or object in front of you
- Znudge the person nearest you
Step 3
Turn on your mic and camera
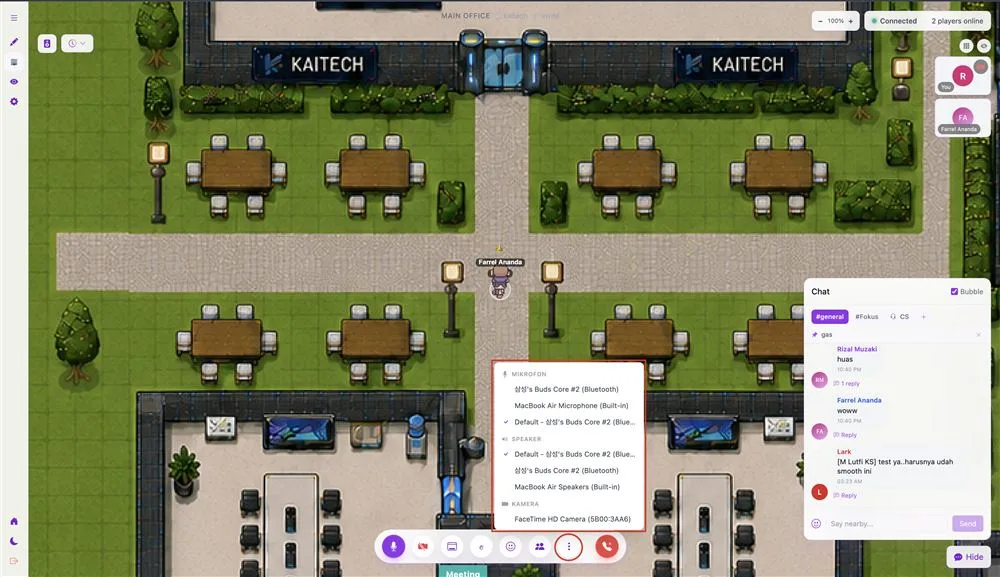
The mic and camera buttons sit in the bottom toolbar. The shortcuts are M for the mic and V for the camera.
There is no "join call" button here. Sound gets louder as you approach someone and fades as you walk away, exactly as in a real office — walking over is how a conversation starts.
Wrong mic or camera in use? Click the three-dot (⋮) icon in the bottom toolbar to pick another device.
Shortcuts
- Mmute / unmute the mic
- Vturn the camera on / off
Tip
The first time you join, your browser asks for microphone and camera permission. If you refused it by accident, fix it from the padlock in the address bar — not from inside KAISPACE.
Step 4
Make your avatar look like you
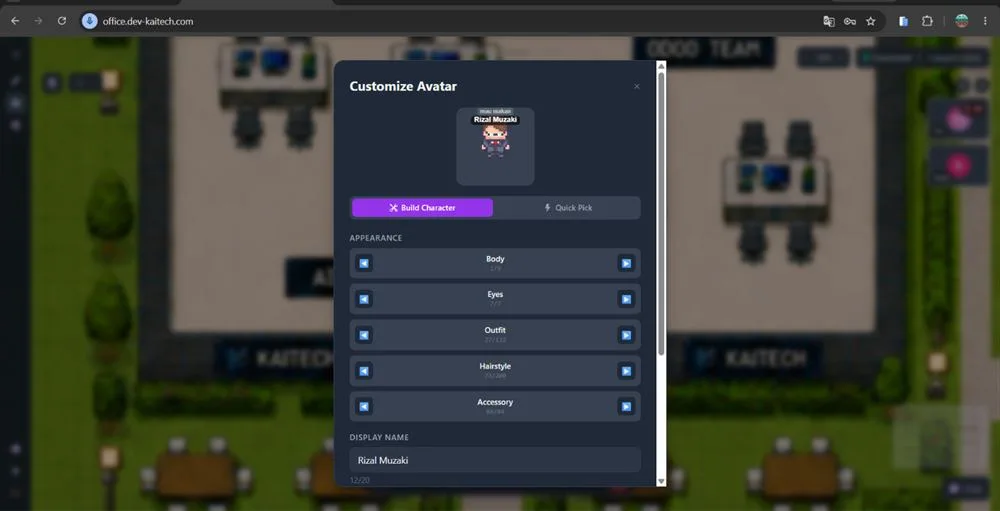
Click the pencil icon in the left sidebar to open Customize Avatar. Clothing, face and hair are chosen separately in the Skin tab, eleven options each.
Set your display name in the "Display Name" field, up to 20 characters. That is the name your colleagues read above your avatar.
Tip
Use the name your team already knows you by, not a new handle. Half the point of a virtual office is knowing who is walking over.
Step 5
Set your working status
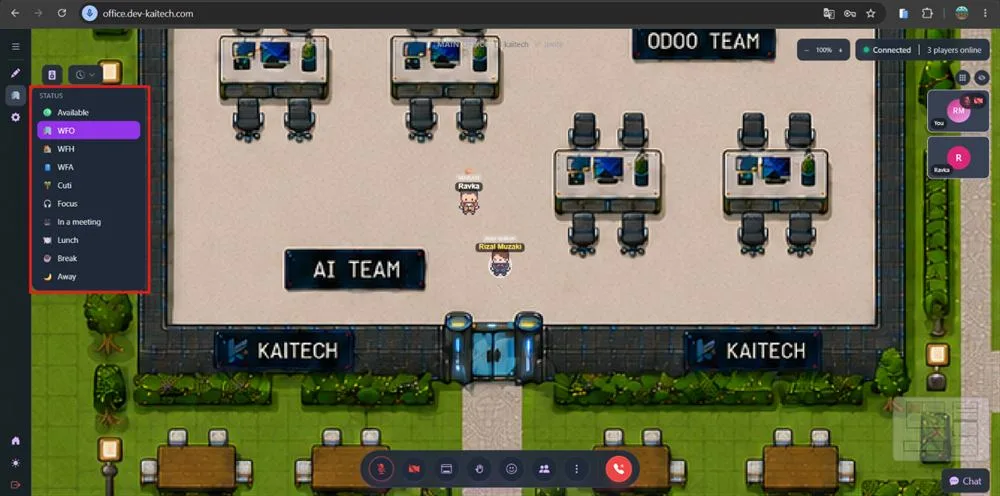
Click the flag icon to pick a status: Available, WFO, WFH, WFA, on leave, Focus, In a meeting, Lunch, Break or Away.
It shows above your avatar and in the member list. This is what tells people when to walk over and when to wait — without having to ask in chat first.
Step 6
Talk, meet, and raise your hand
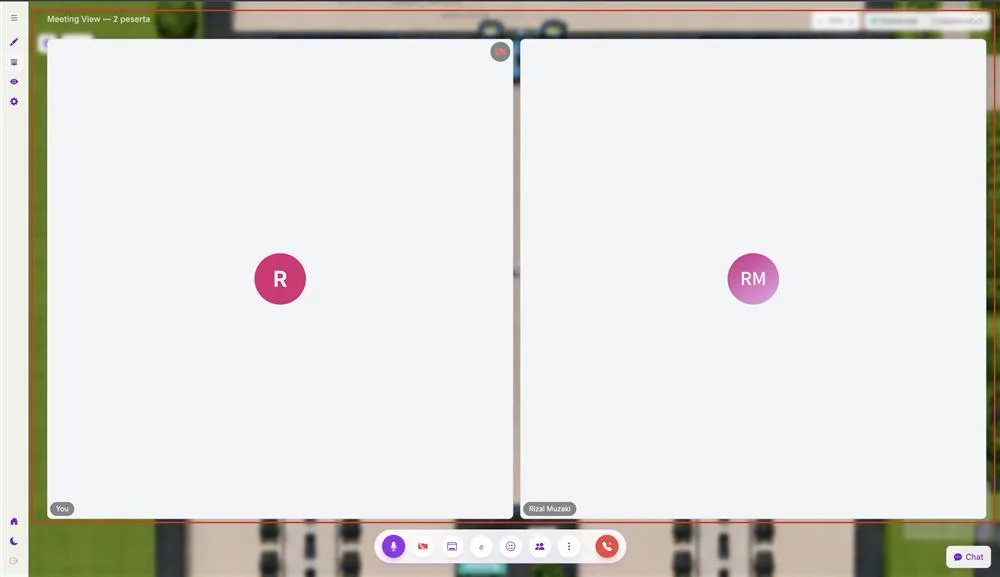
Walking over to someone is enough to start talking. For a more formal meeting, click the grid icon to enter Meeting View — a full-screen video layout like any meeting app. Click a tile to pin it, click "Lepas" to go back to the grid.
The Chat panel has a "Bubble" checkbox in its top-right corner. With it on, your message does not go to a channel but floats as a speech bubble above your head — and only people near you can read it.
Press H or click the hand icon to raise your hand. It appears on your avatar and your video tile, with a sound for everyone else. The smiley in the bottom toolbar sends a quick reaction.
Shortcuts
- Hraise / lower your hand
Step 7
Move between rooms without walking
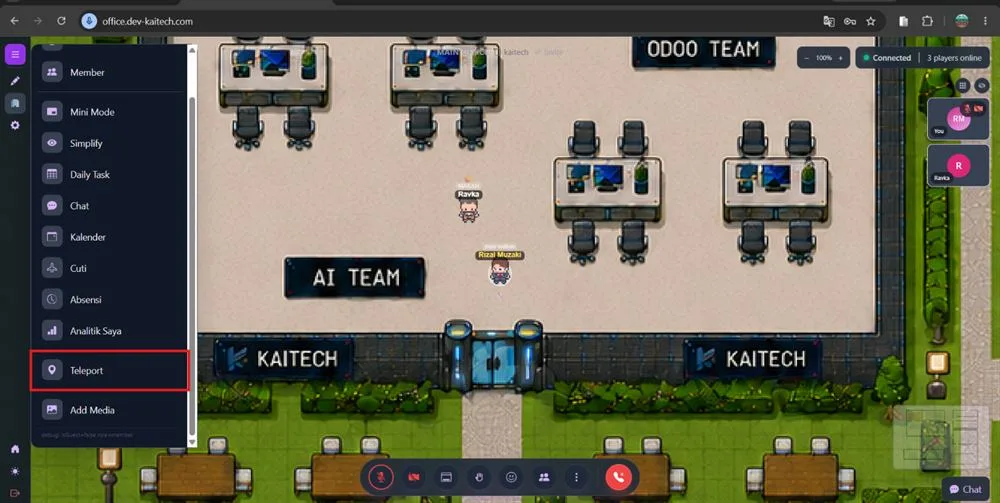
Open the ☰ menu ("Room Features") in the left sidebar and pick Teleport. The list holds every zone and room — team areas, meeting rooms, Focus Mode, the Lounge. Pick one and you are there.
Have a regular desk? Sit in its chair, then click "🪑 Assign as My Seat" above the toolbar. From then on you are seated there automatically every time you enter this room — it is stored in the database, so it survives signing out.
Step 8
Present, and pin material to the map
Click the share-screen button in the bottom toolbar to start sharing, click it again to stop.
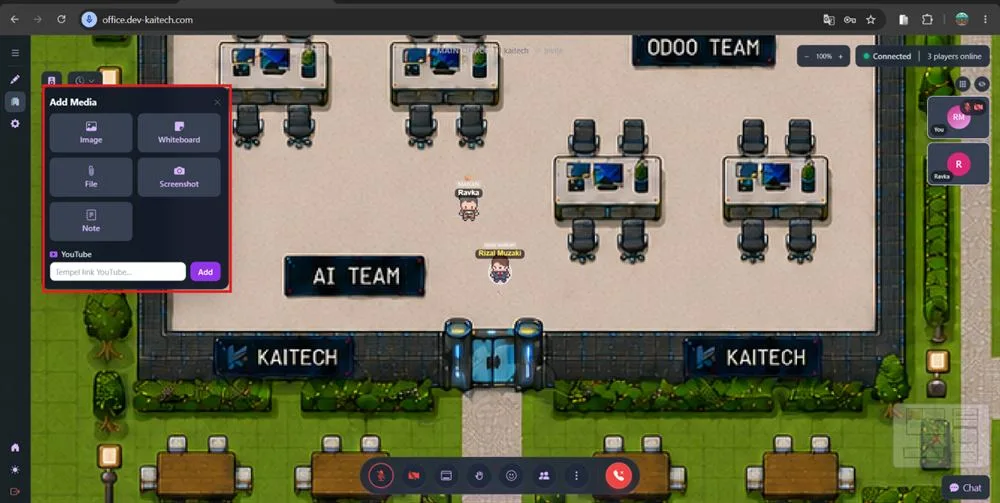
"Add Media" in Room Features pins material straight onto the map: an image, a shared whiteboard, a file, a sticky note, or a YouTube link whose video then plays in the room. Anyone who walks up can open it by pressing X.
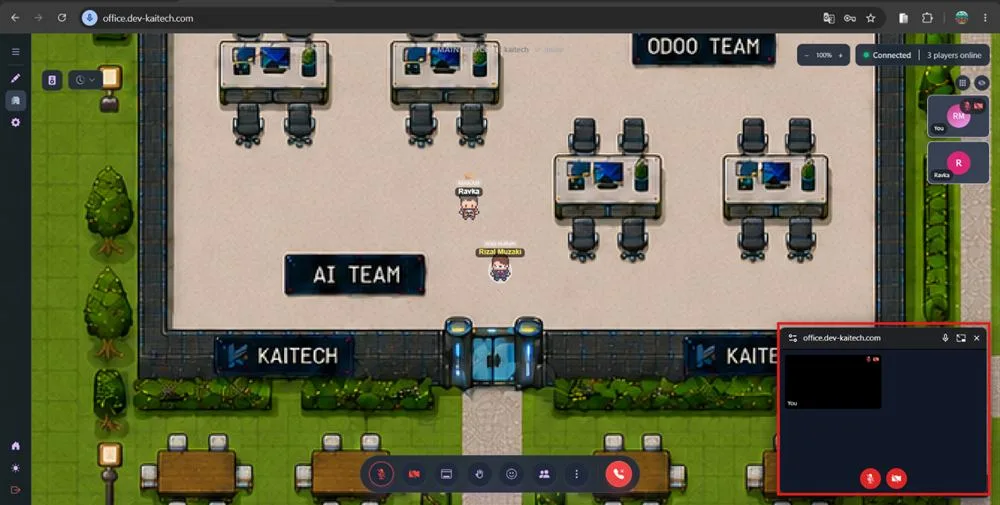
Mini Mode opens a small floating camera window you can drag anywhere, so your camera stays visible while you work in another panel.
Step 9
Record what matters
The "Start Recording" button sits at the top of the screen. An admin in the room starts it, and what gets recorded is that admin's own session: their camera, microphone and screen.
When the browser asks which screen or tab to capture, choose "This Tab" — so the recording does not stop when you switch tabs.
The result lands in "Rekaman Saya" under Room Features, with play and download buttons. One recording runs up to 80 minutes, and the file can be downloaded 3 times within 3 days.
Tip
Recording the whole room at once — every participant in one file — is not available yet.
Step 10Needs Lark
Attendance, tasks and leave
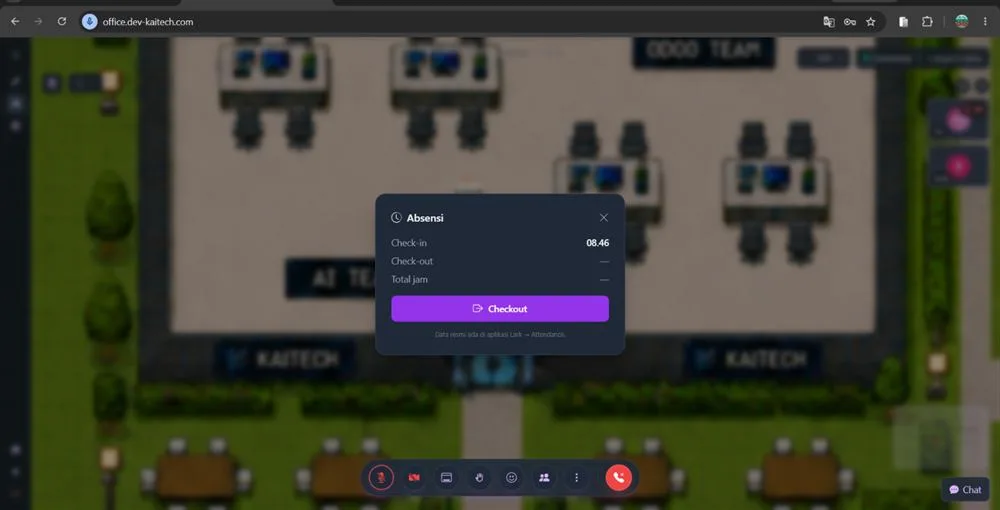
The Attendance panel in Room Features shows today's check-in, check-out and total hours, with a Checkout button to end the working session.
Daily Task: click "+ Tambah Task", fill in the title, pick a workstream and priority, then "Simpan ke Lark". Leave: click "+ Ajukan Cuti", choose the type and dates, then "Ajukan ke Lark".
The Calendar shows your schedule by Day, Week, Month or Agenda. Click "+ Acara" to add an event, or "+ Kalender baru" in the left panel to create another calendar.
These panels are shortcuts, not stores. The record of truth stays in Lark — Base for tasks, Approval for leave, Attendance for hours.
Without Lark?
Without Lark connected, these four menus simply do not appear in Room Features, and the other nine steps of this guide work in full. Presence is still recorded inside KAISPACE itself through status and My Analytics — what you lose is the link to your HR system.
If something is not working
- No sound from your mic
- Check the microphone permission in your browser settings, make sure the right device is selected under ⋮ in the toolbar, and that the mic button is not red.
- Black camera
- Check the camera permission in the browser, then re-pick the device under ⋮.
- Cannot get into a room
- The room may need an admin to approve you, or you are a guest who has not been given access to that zone.
- You cannot hear someone
- Look for a "connection lost" marker on their tile first. If there is none, walk closer — sound follows distance — or check that their volume slider has not been turned down.
Still stuck? Click the Chat button in the bottom-right corner, open the CS tab, and type "admin" to be put through to our team.
Contact Our Team